How To: Lower Screen Brightness Below the Default Level on Your iPhone (Without Jailbreak)
An iPhone's display can get seriously bright, whether LCD or OLED. When you're in bed at night or in a dark room where you don't want to disturb others visually, the brightness is even more noticeable. But there are a few built-in ways in iOS to reduce brightness below the default levels for less eye strain and other reasons.With the built-in tools that Apple provides for display brightness, you can turn the screen light so low that the display appears to be off, to give you an idea of just how dim it can get. For that reason, it's best to turn your screen brightness all the way up before starting with Step 1 below. If you don't remember how to adjust display brightness normally, reference Step 3 below.Don't Miss: Change Text Size on Your iPhone for Smaller, Bigger, Bolder Fonts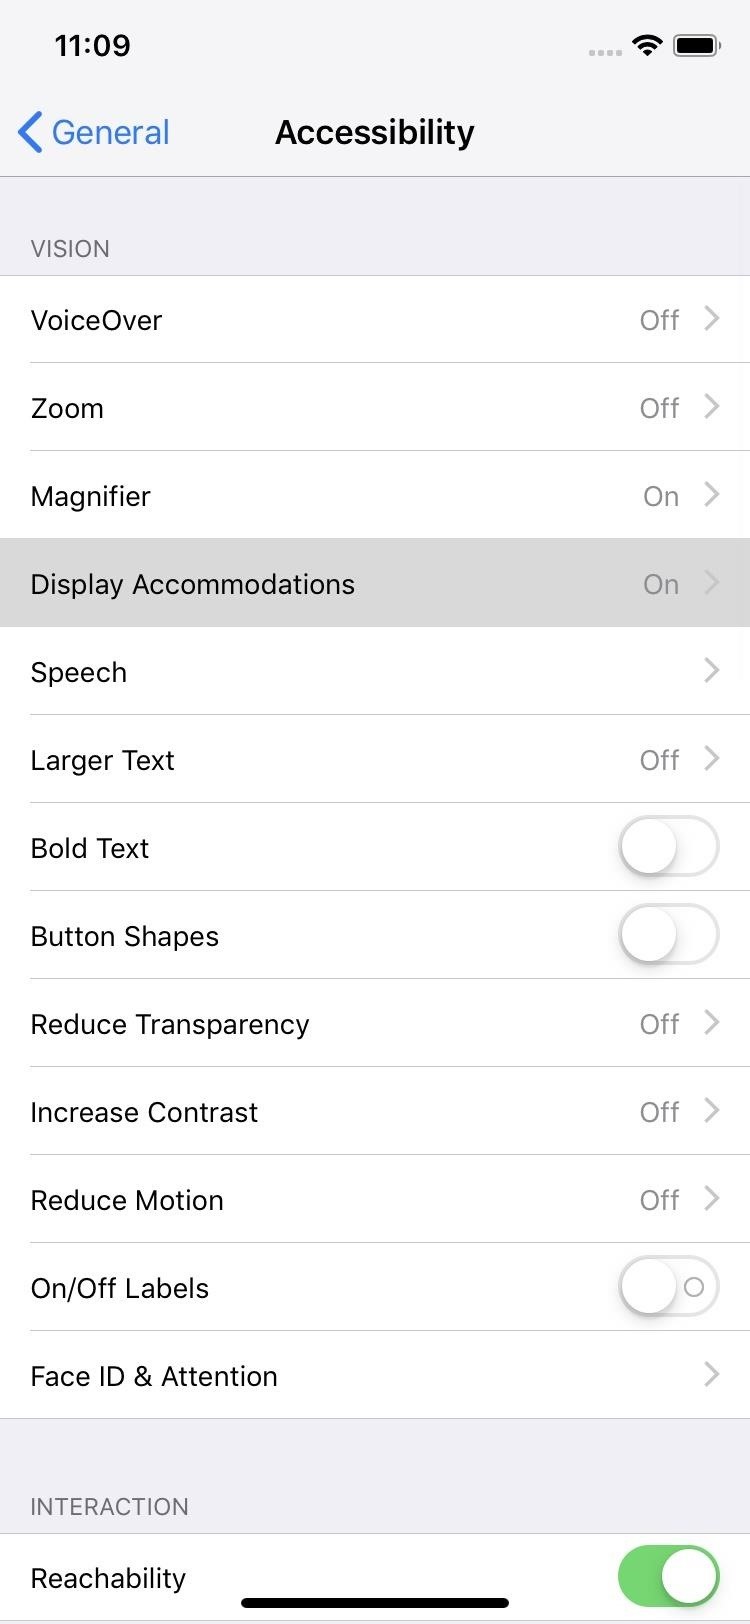
Step 1: Reduce White PointThose white parts on the screen are the brightness areas, so reducing how bright the whites are themselves will help push down the overall display brightness below the defaults. To do this, open Settings, tap "General," and open up "Accessibility." Next, tap "Display Accommodations," and toggle on "Reduce White Point." When the slide appears, slide it up to 100 percent. If you want to toggle this on and off faster, in the "Accessibility" settings, go all the way down and tap "Accessibility Shortcut." Then, just make sure "Reduce White Point" is checked. Afterward, triple-click either the Home or Side button, depending on your iPhone model.If you only have "Reduce White Point" checked for the accessibility shortcut, triple-clicking will turn it on and off right away. If you have more than one thing checked, an action sheet will pop up — tap "Reduce White Point" to turn it on or off.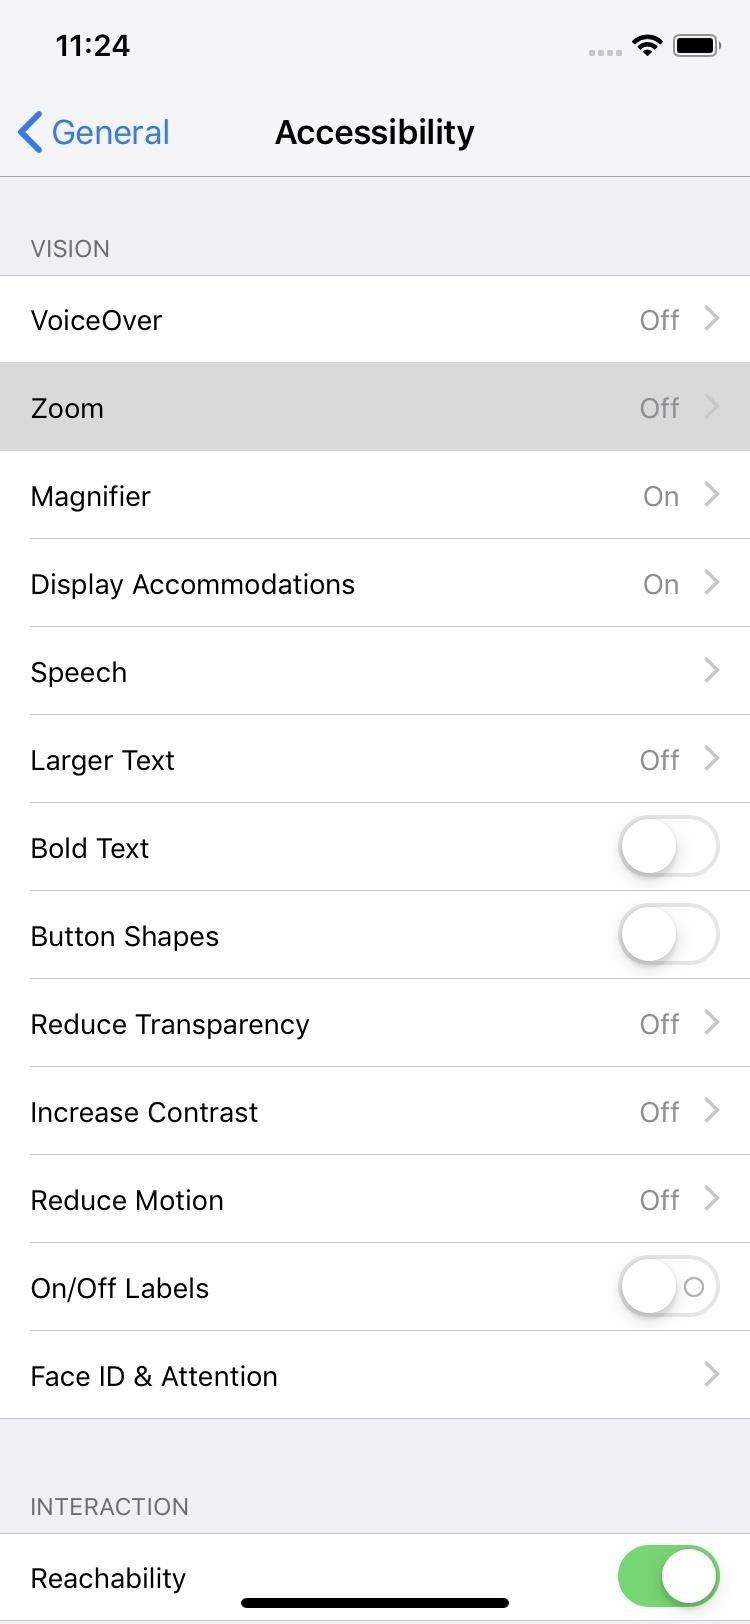
Step 2: Use the Low Light FilterIf lowering the white point still isn't dim enough for you, the second thing you can do is add the Low Light filter, which first appeared in iOS 8. To do so, open up Settings, tap "General," then "Accessibility." At the top, tap "Zoom," then select "Zoom Filter." Next, check "Low Light," and you're done. Now, in the "Accessibility" settings, go all the way down and tap "Accessibility Shortcut" again. Then, just make sure "Zoom" is checked. Afterward, triple-click either the Home or Side button, depending on your iPhone model.If you only have "Reduce White Point" checked for the accessibility shortcut, triple-clicking will apply the filter and reduce brightness right away. If you have more than one thing checked, an action sheet will pop up — tap "Zoom" to apply the filter and reduce brightness. Your display may zoom in afterward, and if so, tap the screen with three fingers at the same time to go back to the zoom-less view.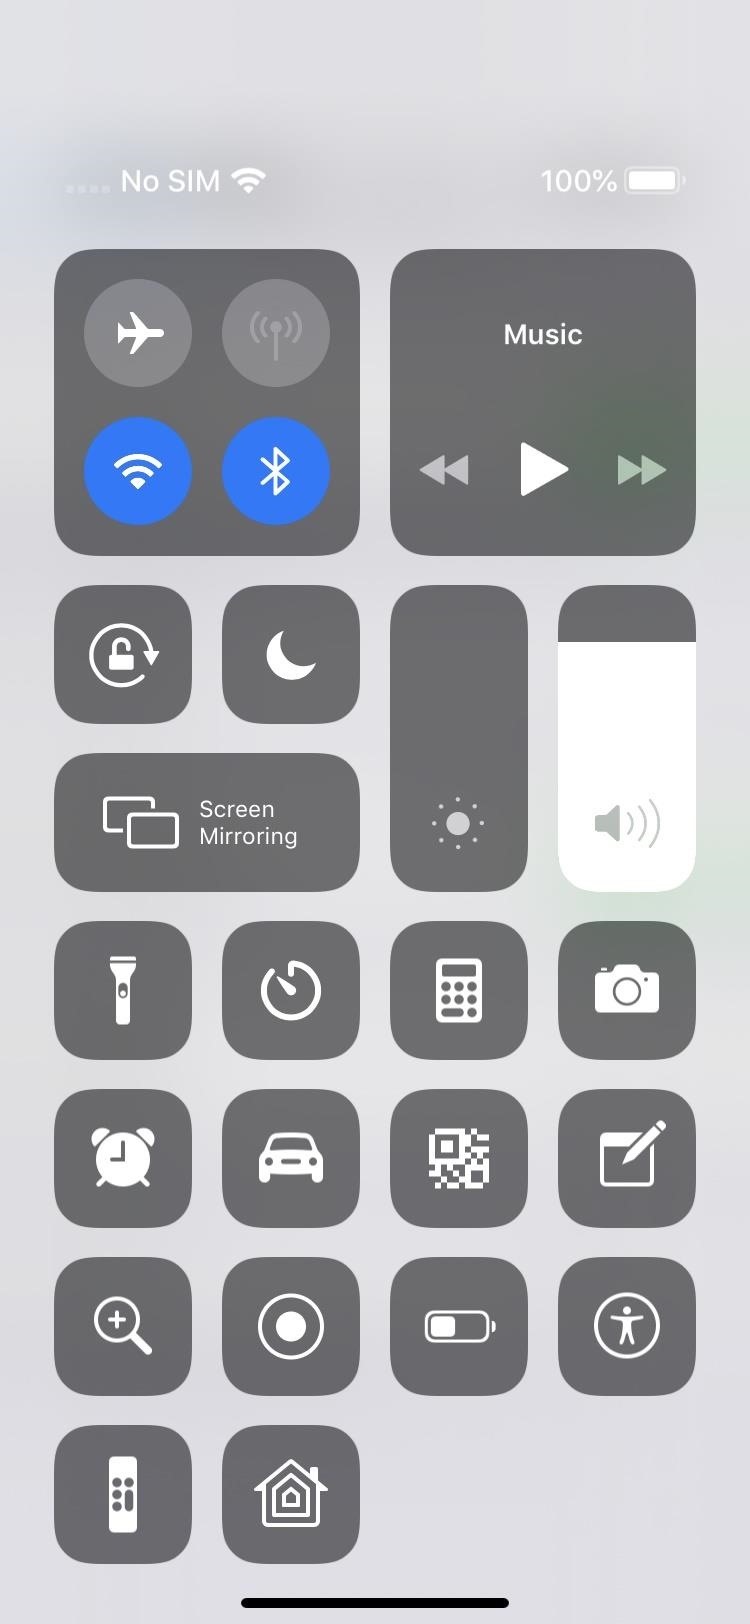
Step 3: Lower Display BrightnessThe last thing to do is to use the normal brightness controls to make the display even dimmer. However, at the point, the screen will already be super dark, but you can go even lower if you want.To do this, open up the Control Center and move the display brightness control down. Alternatively, you can open Settings, tap "Display & Brightness," then adjust the brightness slider accordingly. With the display brightness turned all the way down, Reduce White Point enabled, and the Low Light filter applied, items on your screen won't even be visible — that's how dark it can get. That could make using your iPhone very difficult.If you accidentally turn it the brightness entirely off, you can use the Control Center and slide up the brightness where the control typically sits. You won't be able to see what you're doing, but it's easy enough since that control doesn't seem to move. If you can't get that to work, restart your iPhone.Don't Miss: Keep Your Night Vision Sharp with the iPhone's Hidden Red ScreenFollow Gadget Hacks on Pinterest, Reddit, Twitter, YouTube, and Flipboard Sign up for Gadget Hacks' daily newsletter or weekly Android and iOS updates Follow WonderHowTo on Facebook, Twitter, Pinterest, and Flipboard
Cover photo by Nelson Aguilar/Gadget Hacks; Screenshots by Justin Meyers/Gadget Hacks
Just because you're not Batman doesn't mean you can't use a hidden room that's camouflaged as a bookshelf. Maybe you have a collection that's worth a lot of money, or a super-secret lab—or, like YouTube user korostelevm, maybe you just want a good hiding place for your guns.
How to Turn Your Old NES Controller into a Wireless Light
Android's notification system is quite robust, especially now that Google added bundled notifications and quick reply features to Android 7.0 Nougat. However, things can still get quite cluttered when you have several unread messages, which fills your status bar with icons and makes your notification tray take up half of the screen by itself.
How To Transform Your Android's Notification Tray
Do you see spam or useless websites in your Google search results? This video tutorial will show you how to solve this problem in Google chrome browser. Category
How to Block Porn from Google Search - wikiHow
In this guide, you will learn some tips on How To Turn On / Off Android Phone Without Power Button.If your Power Button is not Working or Broken then this guide is the perfect solution to your problem.
Grayscale Mode in iOS 8: Proof That the Next iPhone Will Sport an AMOLED Display? News: Samsung Is Bringing the Galaxy A6 to the US — Budget Phone with a Flagship Screen How To: Replace the Cracked Screen on Your Samsung Galaxy S III
Break Free from Your Smartphone Addiction by Turning Your
In Google Maps, you can create a list of places, like your favorite places or places you want to visit. Make a new list. On your Android phone or tablet, open the Google Maps app . Tap Menu Your places Saved. In the bottom right, tap Add . Enter a name and description. Tap Save. Save a place to a list. Open the Google Maps app .
Step 2: Scan QR Codes from the Lock Screen. With the "Scan QR Code" button now available in your iPhone's Control Center, you're free to instantly scan items that catch your interest without having to unlock your device or thinking about whether or not the Camera app does the same thing.
How to Read QR Codes With a Smartphone | PCWorld
How to Use a Bluetooth Device. Bluetooth is a wireless technology that has been around for over 20 years. It allows multiple devices to connect, interact, and sync without needing to set up complex networks and passwords.
DIY Bluetooth Speaker: 9 Steps (with Pictures)
At long last, Star Wars: Galaxy's Edge has arrived at California's Disneyland--and it's coming soon to Florida's Walt Disney World in August. The new area takes up 14 acres at the theme park as it
Galaxy's Edge interactive experiences - bounty hunters and
xda-developers Samsung Galaxy Note 10.1 Galaxy Note 10.1 General Creating CUSTOM BACKGROUNDS for your S-Notes by mitchellvii XDA Developers was founded by developers, for developers. It is now a valuable resource for people who want to make the most of their mobile devices, from customizing the look and feel to adding new functionality.
You may have read many articles and videos listing out the best apps that are available for Android. However, most of the listed apps are on the Play Store. So we've decided to do something different, and we came up with our 16 best android apps not on Google Play Store or banned android apps that
6 Superb Android Apps You Won't Find in Play Store
Greenify is a terrific app that allows you to put battery-hogging apps into "hibernation." Effectively closing the problematic apps and preventing them from running until you explicitly launch one of them, hibernation is a great way to save battery life while you're not using your phone.
Automatically Hibernate Apps for Better Battery Life with
Step 5: Customize Your Navigation Bar. If your device passed through the app's testing and is shown to be compatible, you can now customize your navigation bar. You have multiple options for doing so, and can set the button layout to standard, compact, left or right oriented, and tablet mode.
Before starting any drive where you're using Google Maps for directions, it's vital to make sure the app is functioning correctly, specifically, navigation prompts. After initiating turn-by-turn directions on your Android or iPhone, the last thing you want to worry about is Google Maps not audibly
0 comments:
Post a Comment