Kodi 101: How to Customize the Main Menu
The default look for Kodi is a menu that shows all of the possible media playback options available to the media player. From movies to radio, Kodi's main menu has an option to meet your needs. But everyone's needs are different, and sometimes we don't want all of these options.Because of Kodi's versatility, it can be tailored to suit your individual needs. If you just want to use it to stream movies, Kodi lets you do that. Or if you're only interested in TV shows, you can remove the other menu items to put focus on what you actually care about. The best way to do this is by customizing the main menu.Don't Miss: How to Change Kodi's Default Skin for a Fresh New Theme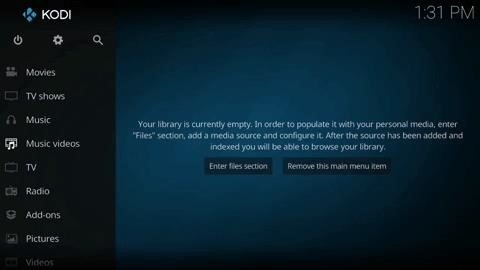
Step 1: Disable Unwanted Menu ItemsFirst, open either Kodi for Android or Kodi for iPhone. If you don't want the app to show certain menu options, start by tapping the gear icon in the upper-left corner. Once the Settings menu is displayed, tap on "Skin settings." A list showing all main menu options will come up. Scroll through the options and disable whichever options you don't need.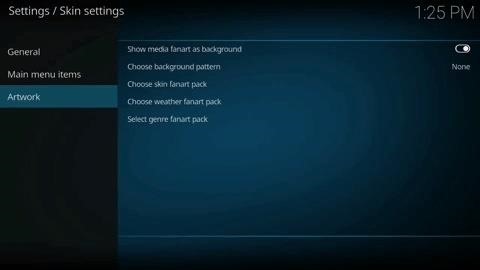
Step 2: Change the Background PatternNext, we'll take things a step further and customize the whole look of the main menu. From the Skin settings menu again, select "Artwork" in the side navigation menu. This offers several options for the background which will display throughout Kodi. By pressing "Choose background pattern," Kodi will show various background patterns that you can enable. Below this option are three choices of background packs based on the image displayed. You have the option of either a "skin fanart," "weather fanart," or "genre fanart." When you choose one of these, you'll see a pop-up menu asking you to download an add-on. Press "Yes" to install it, which will return you to the previous menu.From there, select your preferred "fanart" option again, then tap "Get more" to be presented with a list of icon packs and background packs to alter the look of Kodi. Choose the one you would like to use, then tap the "Install" button in the lower-right corner of the screen.Please note that some background packs require the use of a particular skin. To learn how to switch skins in Kodi, just head to this link.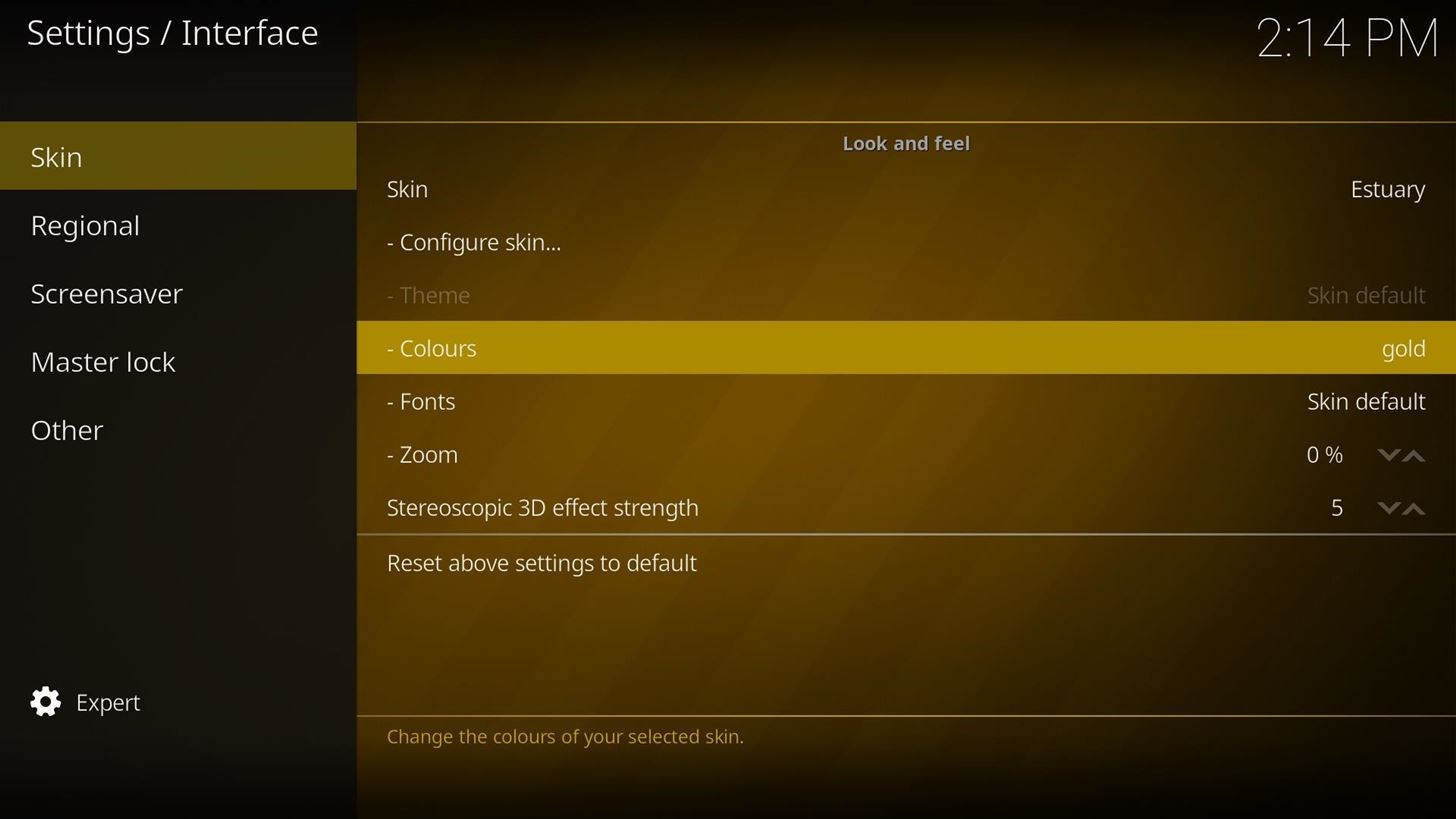
Step 3: Change Overall ColorsIf you're not a fan of Kodi's default blue hue, return to the main Settings menu as depicted in Step 1, then select "Interface settings." Next, select "Skin" from the left menu, then you'll see an option labeled "Colours," which is set to "Skin default." Tap on this option to bring up a menu with a list of all colors available to you. From there, pick the color you wish you use and you will be returned to the Interface settings menu with the new color applied.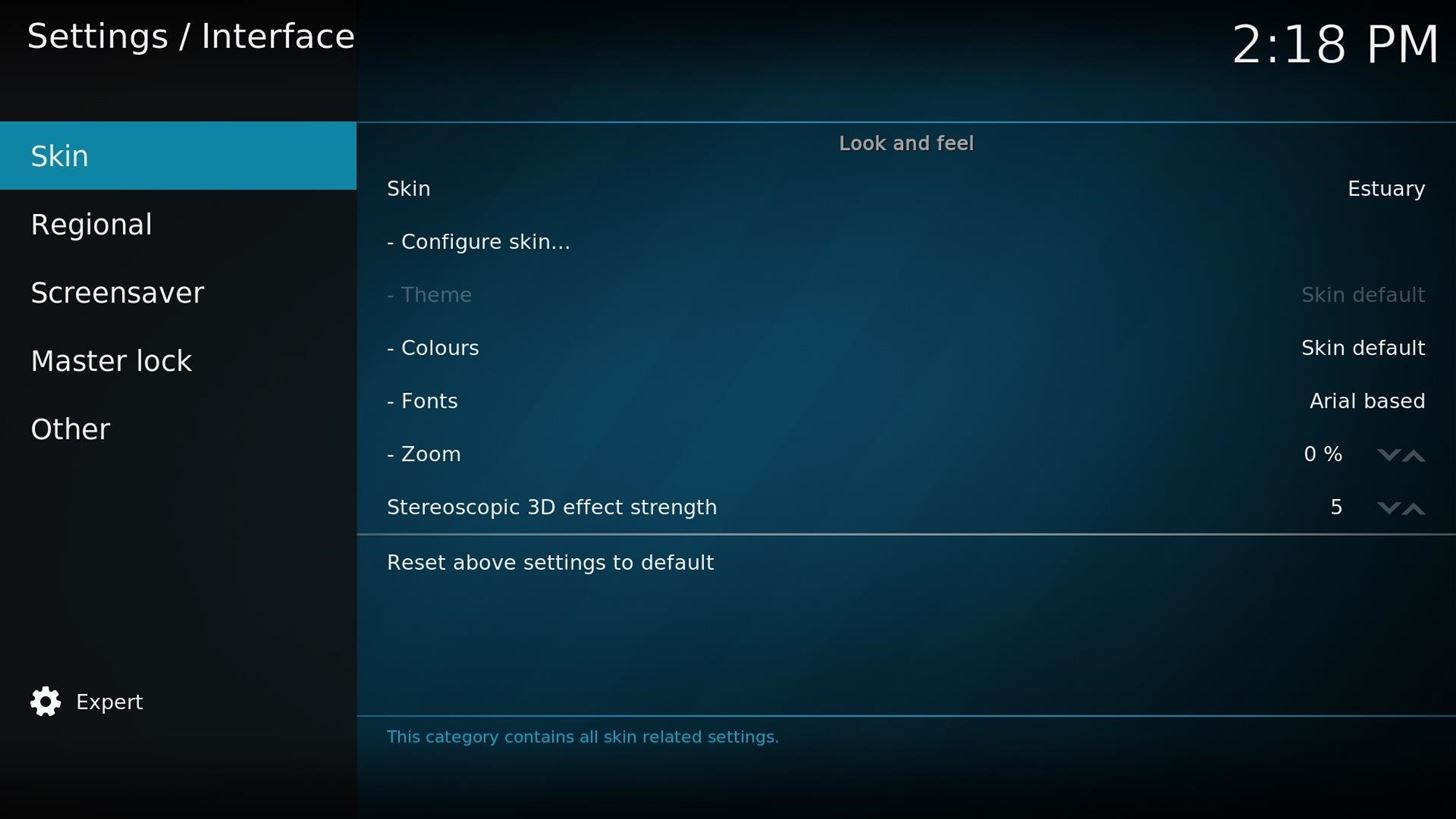
Step 4: Change FontsFinally, you can change the font used in Kodi's main menus if you'd like. Underneath "Colours" in the Interface settings menu we covered in Step 3, you'll find an option called "Fonts," which is set to "Skin default." Press on "Fonts" to change the font of all text in Kodi to "Arial based," which has a slightly less techy look. With these small changes, you can change the overall look of your Kodi layout. When you combine these modifications with all of the different skins available in Kodi, you can create a unique look for your setup. While you're here, share your Kodi layout with us in the comments below.Don't Miss: How to Add Your Personal Media Library to KodiFollow Gadget Hacks on Facebook, Twitter, Google+, YouTube, and Instagram Follow WonderHowTo on Facebook, Twitter, Pinterest, and Google+
Cover image and screenshots by Jon Knight/Gadget Hacks
iMessage uses iCloud to stay spread out across all of your iOS devices and Macs, and utilizes not only your primary iPhone number, but also your email address(es). You can manage what email addresses are allowed to be used for iMessage, and you can even add or remove email addresses that you can use for sending and receiving message.
The Smart Lists created by Facebook you can not delete, but you can Archive them (the custom lists you create you can delete). Home News Feed > in left column click the title of the FRIENDS section > to the right of each list click the gear icon to get options
How to Turn Facebook Friends Into "Acquaintances
How to Use the Bluetooth device on a Palm Centro cell phone
How to get Snapchat's selfie Lenses. You can use lenses on both still photos and video. Snapchat also allows you to add captions in a selection of bold, funky fonts and colors. 2016 saw a
16 Snapchat tips and tricks you probably had no clue about
How To Change ZIP File To IPSW File (HD) Hope This Video Helped U Dont Forget To Check My Other Videos And Like,Share,Subscribe For More Videos Did You Like My Theme Check My Top 10 WinterBoard
How to Convert Firmware Zip to IPSW Easily - OS X Daily
osxdaily.com/2017/05/29/convert-zip-ipsw-firmware-ios/
Thus, a .zip file is not an .ipsw file, and an ipsw file is not a zip file - you can not simply change a random .zip archive file extension to .ipsw and expect it to work and be recognized as a firmware, that's not how it works. Remember to always download .ipsw files only from Apple servers, if you're not sure hover over the IPSW link to
How to make a .zip file into a .ipsw ((on windows)) - SiNfuL
Best Windows Phone alternatives for people who miss their Microsoft phones. Microsoft struggled to gain the users and top apps it It should work on most Android phones (you may need to
Verizon to pre-install a 'Spyware' app on its Android phones
iOS 9: Cool new features coming to iPhone, iPad, and iPod touch Apple continues refining the appearance and behavior of the software that powers the iPhone, iPod touch and iPad," Michael
All the Cool New Features Coming in iOS 10.3 for iPad, iPhone
News: Google's New App Fixes Everything Annoying About Apple's Live Photos How To : The 8 Best New Features in iOS 11's Photos App for iPhone News : Android Is Coming for Your Car, TV, & Wrist
News: Google Finally Releases ARCore 1.0 for Android Users
How To: Monitor Cellular & Wi-Fi Data Speeds from Your Samsung Galaxy Note 2's Status Bar or Notification Tray How To: Get the S5's New Rounded Quick Settings Toggles on Your Samsung Galaxy S3 How To: Disable the Missed Event Widget & "Blocking Mode On" Notification for the Galaxy Note 3
Control Volume Directly from the Notification Tray in Lollipop
Install Safestrap Recovery & Custom ROMs on Your Bootloader-Locked Samsung Galaxy S4 [How-To]
How to Flash a Custom Recovery on the Samsung Galaxy Note 3
Get Quick Access to Almost Any System Function on Your
0 comments:
Post a Comment