How To: Unlock the Nexus 5 Bootloader & Start Modding Your Android Experience
You know what's awesome? You own a Nexus. That means, with Google's blessing, you have easier access and control over your device than other manufacturers allow. You can really dig in and do some interesting things if you root.The big 'R' word can be intimidating for the new and uninitiated, but it doesn't have to be. The process is a breeze once you get down to it, and it's not as daunting as it seems.In order to root and get into that fun stuff, though, the first thing you're going to have to do is unlock your bootloader. An unlocked bootloader is the first step on a journey toward full Android customization, and lucky for us, on a Nexus it's cake-slice simple. Time to get your feet wet. Please enable JavaScript to watch this video.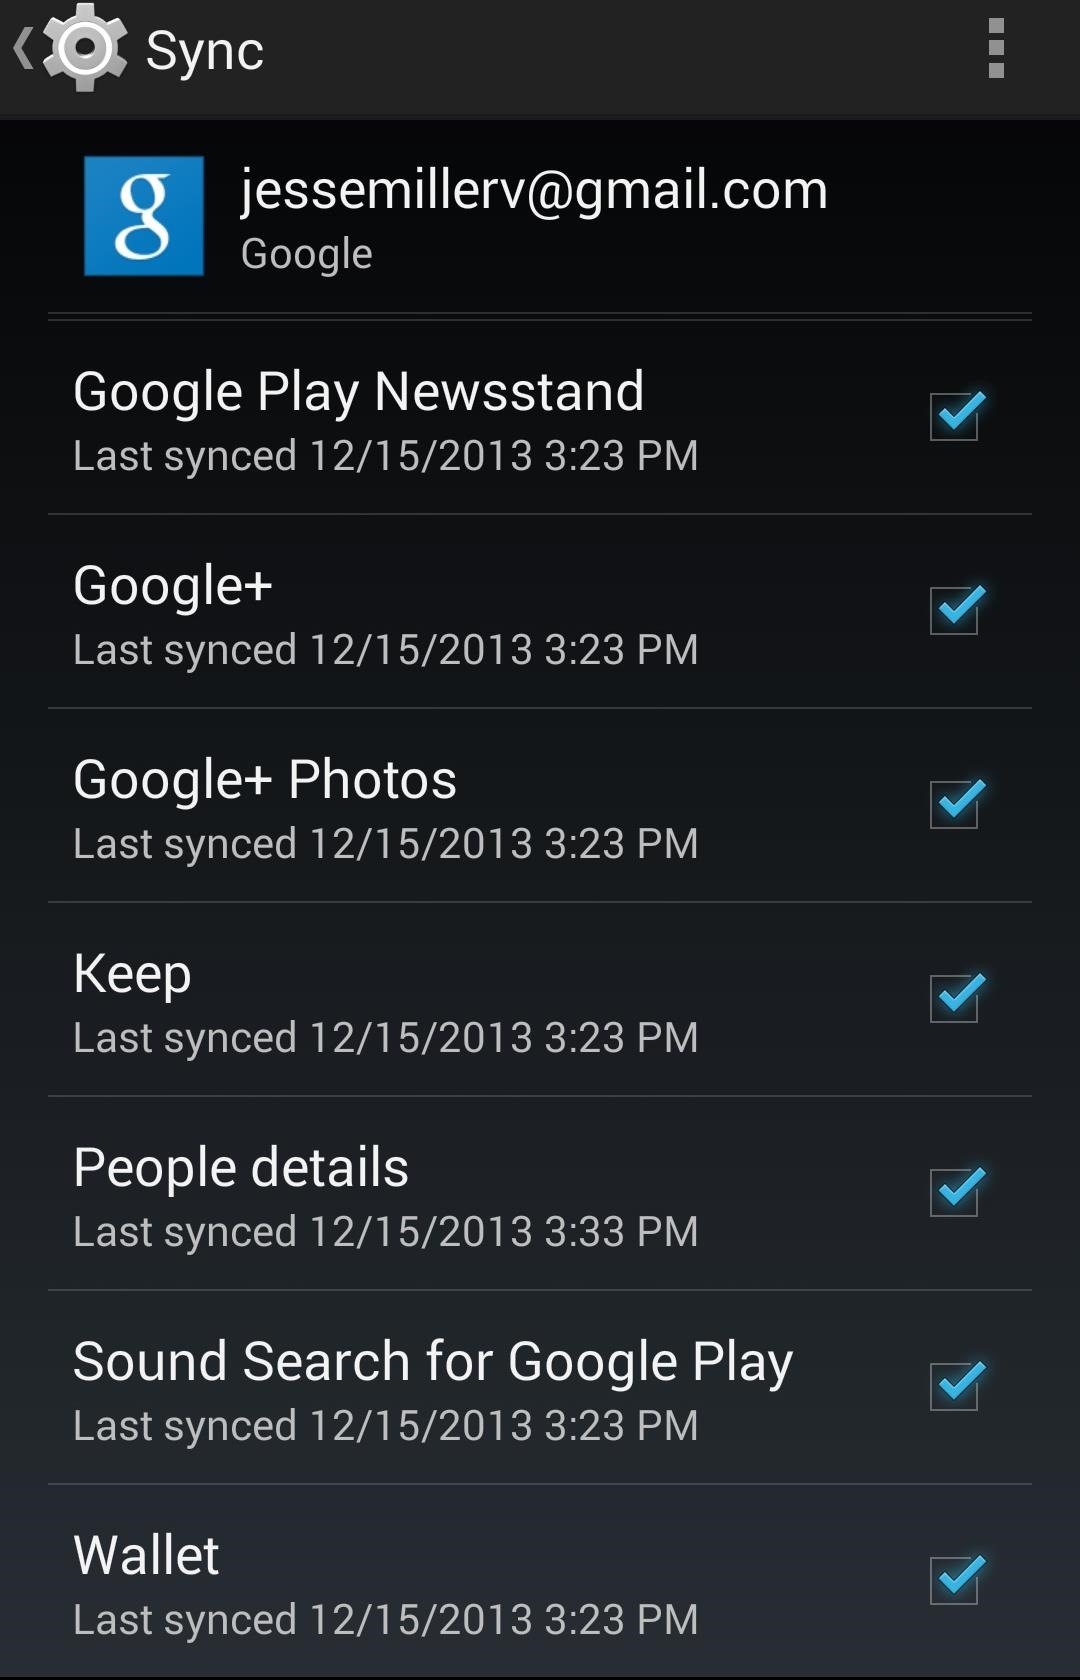
Step 1: Back Up What You Care AboutBefore you touch your bootloader, know this—unlocking the bootloader will erase all user data on your phone. It's the equivalent of a factory reset. It's a security thing. Since an unlocked bootloader allows for deep-level modification, erasing all of your data is the most surefire way to keep your stuff safe if someone gets their hands on your device and tries to break in.So before you proceed further, make sure you've backed up anything you need to keep around. If you're synched with your Google account, stuff like your contacts and emails will be safe. Any apps you've downloaded or purchased will be available to re-download in the Play Store afterward, as well. You can check what's synced under the Accounts section of the Settings menu. If you want to keep your photos, make sure you bring them over to your computer or upload them to Google Photos before continuing.There are also apps in the Google Play Store that will back up your SMS messages if you want to hold onto them. I recommend SMS Backup & Restore.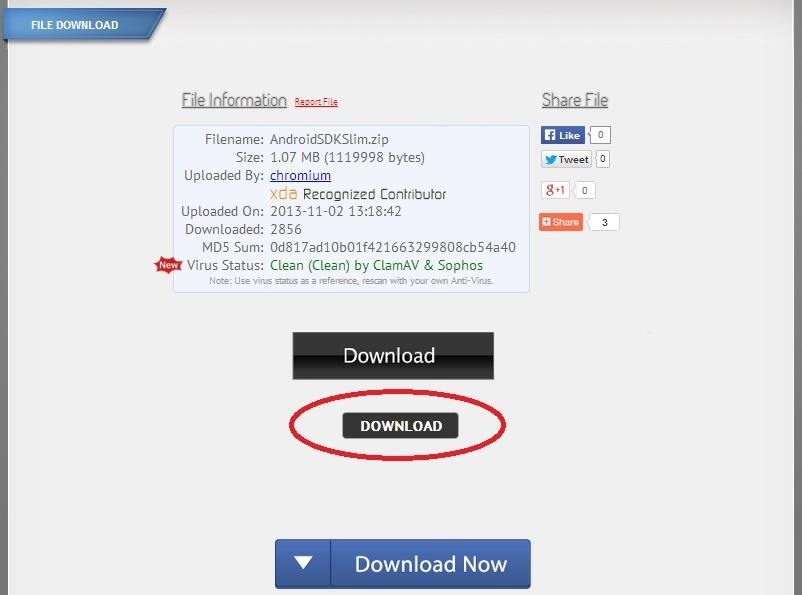
Step 2: Download Android SDK to Your Windows PCThe Android SDK allows your PC to communicate with your device. Downloading this toolkit allows you to issue the command to unlock the bootloader. You can download the full version from Google, or try out the slimmed down version of the essential tools, which I'll be using.If you chose the slimmed down version, too, be weary of ads on the download page. There might be multiple "download" icons on the page. Just make sure AndroidSDKSlim.zip is the only file being downloaded. You're going to need a program to unzip the file after it's been downloaded. There are a ton of programs that do this. WinZip works. So does WinRAR.
Step 3: Unzip Zip FileNow that you've downloaded AndroidSDKSLIM.zip, navigate your PC to the file. For convenience, it's best to create a new folder to unzip the file to. For example, for me, the file lives in my Download folder, and I created a new folder there called SDK to find it more easily, then dragged the .zip file and unzipped from within that folder. Image via wonderhowto.com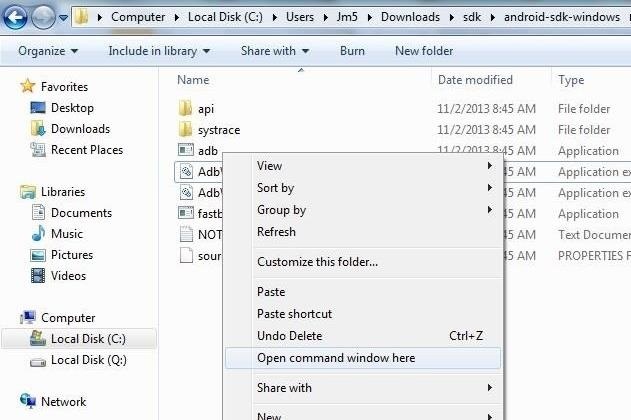
Step 4: Confirm with Command PromptUnzipping the file will reveal a folder that reads android-sdk-windows. Enter the folder, then platform tools. You'll now see files and folders that read:api systrace adb AdbWinApi.dll AdbWinUsbApi.dill fastboot NOTICE source.properties While on this screen, hold down the Shift key and right-click, then click on "Open command window here." Image via wonderhowto.com In the terminal that opens, enter the following command:adb version You should now a response that says Android Debug Bridge version 1.0.31. Image via wonderhowto.com
Step 5: Enable USB Debugging on Your NexusTo allow our Nexus to communicate with our PC, we'll need to enabled USB Debugging on the phone, which can be found in Settings -> Developer Options.If you don't see any Developer Options on your Nexus, go to Settings -> About phone. Scroll to the bottom to Build number and tap it several times. Keep tapping until a popup message reads, "You are now a developer!"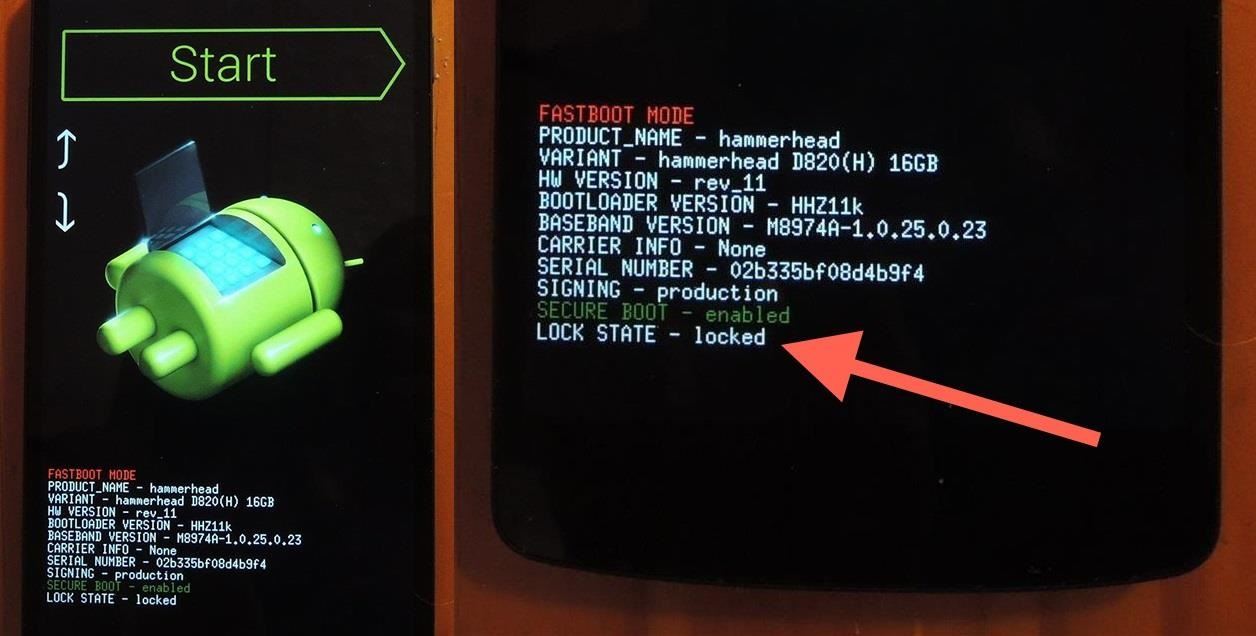
Step 6: Boot Phone into Fastboot ModePower down your device, then hold in the Volume down key and press the Power button simultaneously. You'll see an image of the beloved Android mascot opened up on his back. You should also see a string of text. Do you see at the bottom it reads, Lock State - locked? That's what we're going to be changing.
Step 7: Unlock BootloaderConnect your Nexus to your PC with your Micro-USB cord. On your PC, navigate back to platform tools in the android-sdk-windows folder. Remember, you should be looking at this:api systrace adb AdbWinApi.dll AdbWinUsbApi.dill fastboot NOTICE source.properties Open up the terminal again, if you've closed it, by holding in the Shift key, right-clicking, and selecting, "Open command window here." In the terminal, type in the following command:fastboot devices The command should list connected devices. If you see your phone's serial number, you're ready to rock. If you don't, check out the troubleshooting section at the end of this guide. Now to unlock the bootloader, type in the following command (and remember—unlocking your bootloader will wipe all the data on your phone!).fastboot oem unlock You'll get a message on your phone asking to confirm the command. Use the Volume keys to highlight Yes, then use the Power button to confirm.
Step 8: Reboot with Fastboot CommandAfter you've confirmed the fastboot command on your phone, enter this command into the terminal:fastboot reboot This will reboot your phone and finish the process. You'll get a progress bar on your Nexus while this is happening. It could take about ten minutes. Don't touch or unplug your phone from your PC while this is happening!You're done! Your bootloader is now unlocked and you're free to install a custom recovery and root to your heart's content. Remember, an unlocked bootloader is the first step on an exciting mod journey. Things will only get more interesting from here.
TroubleshootingIf your device is not listed when you run the fastboot devices command you most likely do not have the proper drivers installed on your PC. You can remedy the situation by installing the Universal Naked Driver (the latest version is Universal_Naked_Driver_0.73.zip).If you need any further help, comment below and I'll try and help you out.
How To: Auto-Lower Music Volume Gradually on Android to Drift Off to Sleep More Peacefully How To: Install the Xposed Framework on Your Samsung Galaxy S4 for Quick & Easy softModding How To: Save Snapchats on Android Without Being Detected (No Root Required)
Music Randomly Pauses? « Samsung Galaxy S3 :: Gadget Hacks
How to Program a USB development board for cheap - Gadget Hacks
I cant use any other sim card on palm centro phone which is unlocked one. i can use airtel india with internet but others are not accepting internet connection Every operator has its parametre for recieving data or GPRS and 3G (UMTS).Your phone is configured for airtel but if you want to use others their parameters must be entered separately
How do I use my computer to connect my palm centro the
How To: This Boomerang Hack Lets You Post Apple's Live Photos on Instagram News: Google's New App Fixes Everything Annoying About Apple's Live Photos SUBMIT: Your Best Double Exposure Photo by December 12th. WIN: Paper Pinhole Camera Kit News: Mad Hatter Yourself News: Phone Snap! Wants to Feature Your Work at the International iPhoneography
iPhone 6s Plus: Living with Live Photos - 9to5Mac
Apple Pay has been available to use in stores, as well as in select apps and websites, ever since its first appearance in iOS 8.1. Now, with iOS 12, there are currently 13 different iPhone models that support Apple Pay functionality without the use of an Apple Watch, and the list of partnered stores that accept Apple Pay has only grown.
How to Spy on iPhone Through Icloud - How To: Which Stores
Report Ad
Wireless, Comfortable Headband. Buy Now From The Sharper Image!
Best Deals for Apple iPhone 7 -
News: Cord-Cutting Just Got Cheaper — AT&T's $15/Month WatchTV Service Is Coming Next Week How To: Access free streaming TV and radio using VLC Player Watch Out Facebook & Twitter: Google's Stepping Up Their Live-Streaming Game
How to Watch Free Live-Streaming TV Shows More Easily in
How To: Use Your New Terabyte of Free Flickr Storage for More Than Just Photos Using This Hack How To: Archive files using WinRAR and 7-Zip in Windows XP How To: Get the OS X El Capitan & iOS 9 Wallpapers on Your iPad, iPhone, or Mac
Flickr Now Compelling With Free Terabyte Of Photo Storage And
iOS 10 is currently only available in beta 1 for developers, so to be able to add and remove widgets to your Lock or Home screen you will need to download the beta 1 or enroll for the public beta
Editing Home Screen on N8 - Microsoft Community
Snapchat 101: How to Make Your Own Custom Geofilters & Lenses News: Try These 5 Hot New Snapchat Lenses — The Simpsons, Playable Flappy Bird & More News: 5 Snapchat Lenses You Have to Try Out This Week — World Cup, Superman & More News: Try These 5 Hot New Snapchat Lenses — Iron Man, iDubbz & More News: Snapchat's 'Stranger Things 2
News: Snapchat Bulks Up Lens Studio with Face Templates
0 comments:
Post a Comment